


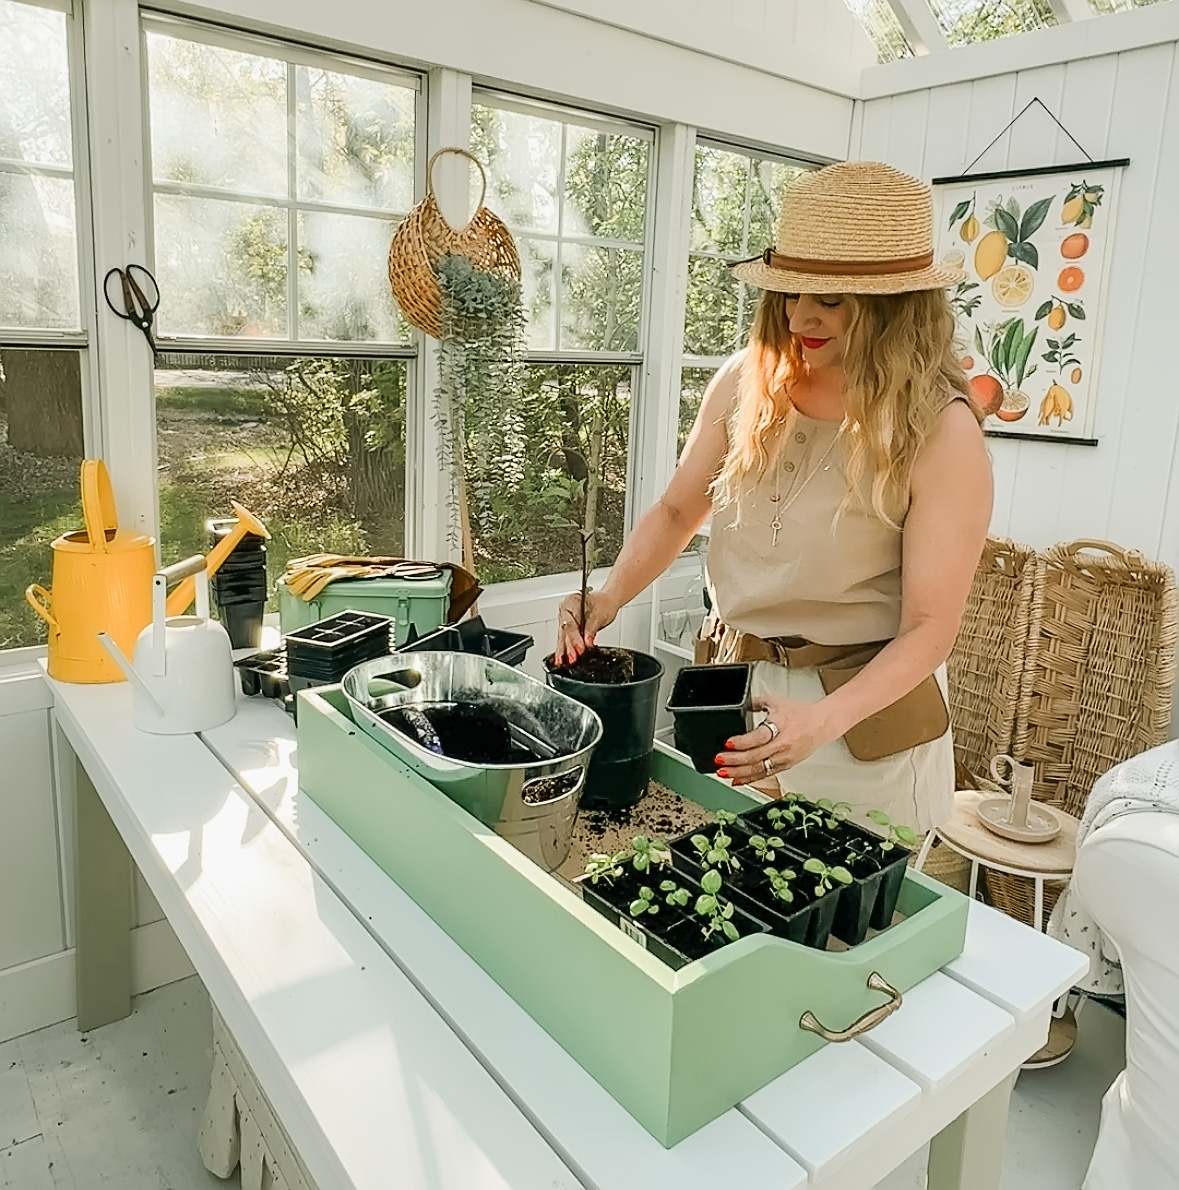
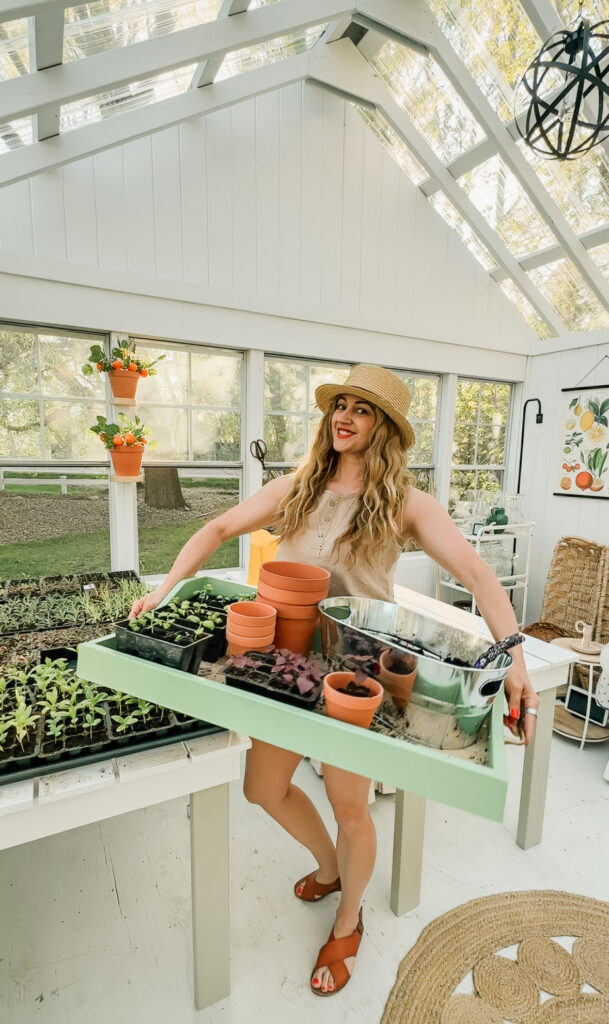
This year, as I filled all my trays and cells for my annual indoor seeding adventure it became painfully obvious to me that I needed a proper potting tray to keep all my soil contained so it didn’t always end up in a mess I needed to clean off my floor.
And when I went into my greenhouse to do all my potting up, well, it finally hit the point where I knew if I didn’t get my butt in gear and make one, I would end up spending half my work-time scooping up my soil piles.

Supplies:
***Alternative methods and supplies to follow.
1 8-foot 6” tongue and groove pine board
1 8-foot pine 1×6
2 pulls/handles for the sides
Paint
Directions (for non-mitred corner version):
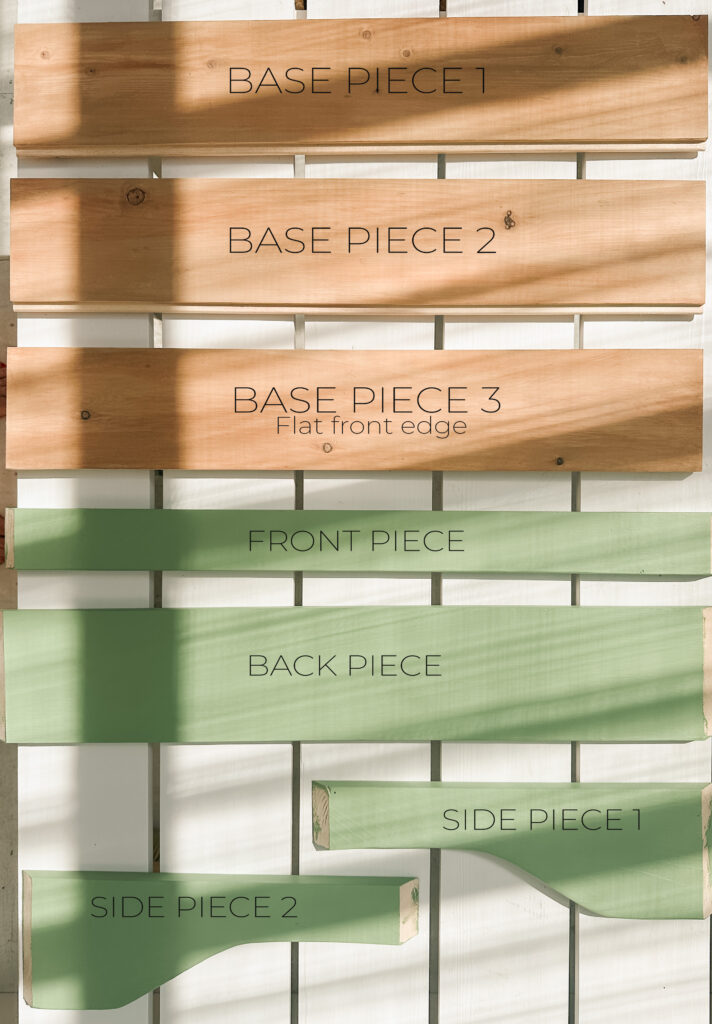
- Cut the pine tongue and groove into three 28” pieces, and cut the lip off of one board leaving a flat edge.
- Insert the 3 pieces tightly into one another and measure the length of the short side.
- Cut 2 pieces from the 1×6 to the length of the short side.
- Place those pieces on the side of your assembled base, and measure the total length of the long side. It should be just under 30”.
- Cut the remaining 1×6 into 2 of those lengths, and cut one of those pieces to 3” for the front of your potting tray.
- Create the shape of the side pieces by drawing a curved line going from the full 6” piece down to meet the 3” front piece. Cut the swooping shape with a jig saw, and sand the top edge until smooth and edges rounded.
- Trace that line onto the board of the opposite side. Repeat step 6.
- Sand the top edge of back and front piece until smooth and edges rounded.
- Paint your side pieces with your chosen stain or paint colour.
- Paint or stain the base pieces with your chosen stain or paint colour.
- Once dry, insert the 3 base pieces together.
- Nail the side pieces on with 1.5” brad nails every 3”.
- Nail the front and back pieces on with Brad nails every 3”.
- Use caulk or wood filler on all the corners and nail holes. Touch up all paint or stain.
- Drill holes for your pulls where you desire and screw them on.
- Enjoy your potting tray!
Alternatives:
I made my tray with mitred edges, but this made it very finicky to have perfectly measured. If you’d like to attempt it that way and know how, it’s a more polished look but I wouldn’t do it again for the time vs reward.
You could also use 6” boards and glue and clamp them together for the base instead of tongue and groove, but my way ensures no soil slips through the base, without needing to seal the seams.
Click here for a link to my Amazon faves for the kitchen, crafting, and garden!
Canadian FRIENDS:
links to the goods


american FRIENDS:
I need to add that I always check locally for all items at a lower price before using amazon.
I do make a small commission on all purchases at no extra cost to you.
Click here for a link to my Amazon faves for the kitchen, crafting, and garden!
