


Welcome to part 1 of my renovation of the front entry!
If you are visiting here from my instagram page welcome!
As promised I’m about to give you everything you could possibly need to be able to accomplish either stripping and refinishing your wood, or adding picture frame mouldings and shoe moulding base trim.
This process included:
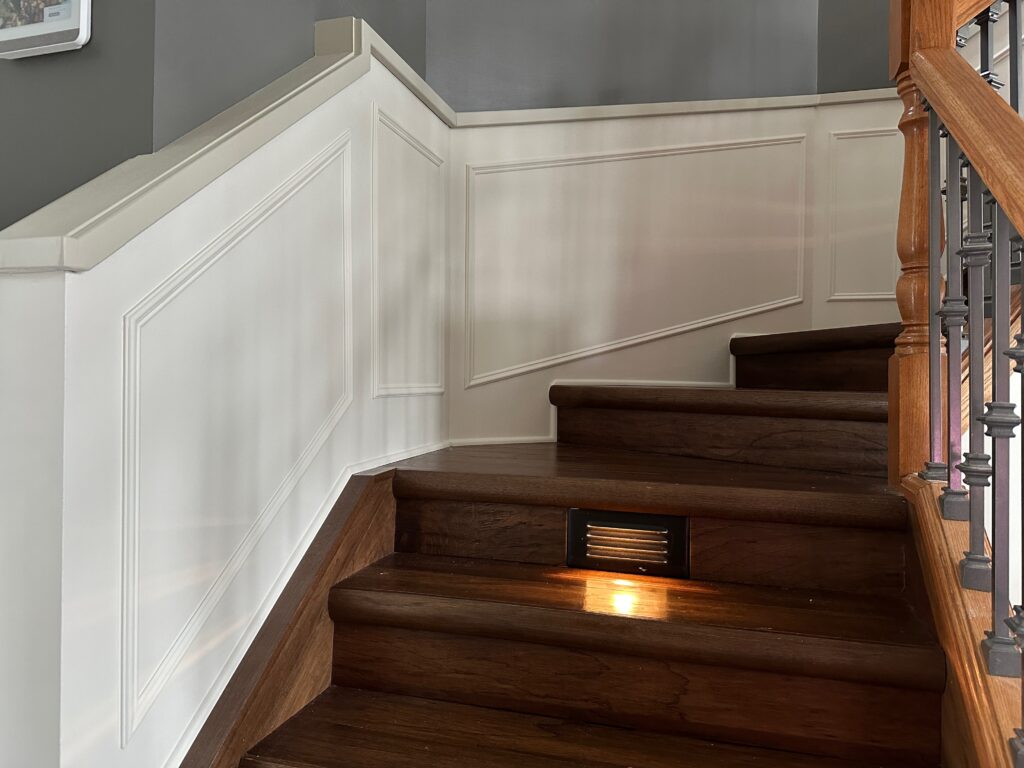
- Stripping the base rail of the paint that I so stupidly added 4 years ago.
- Restaining it to match the existing wood finish.
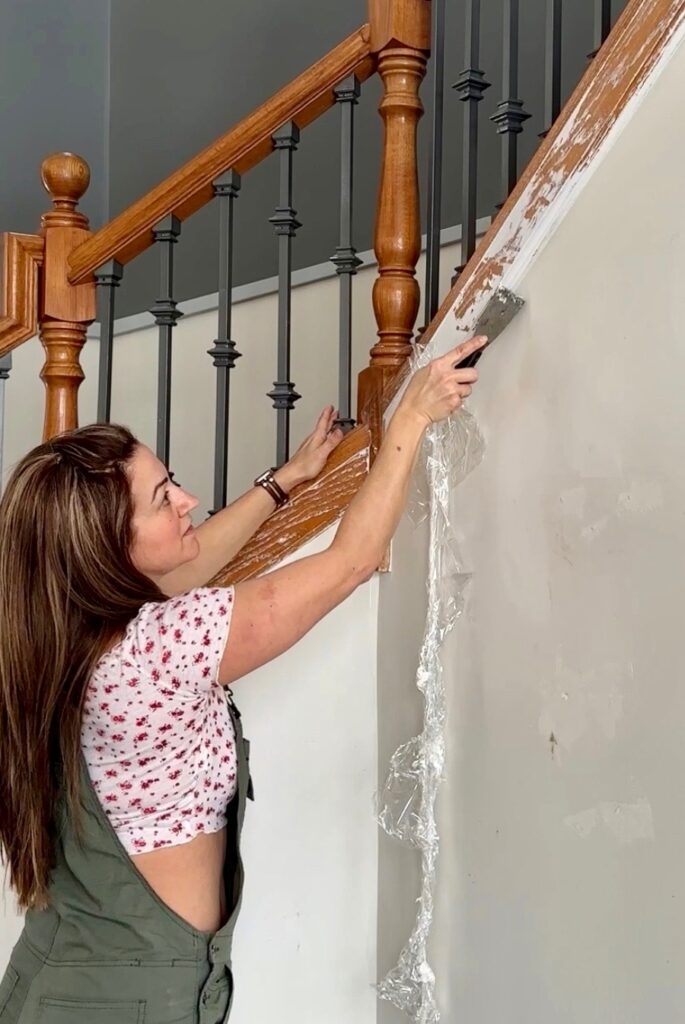
- Patching and painting the walls and rail top on the wall side.
- Adding picture frame mouldings going up the stairs under the rail.
- Adding shoe mouldings to the base of the wall going up the entirety of the stairs.
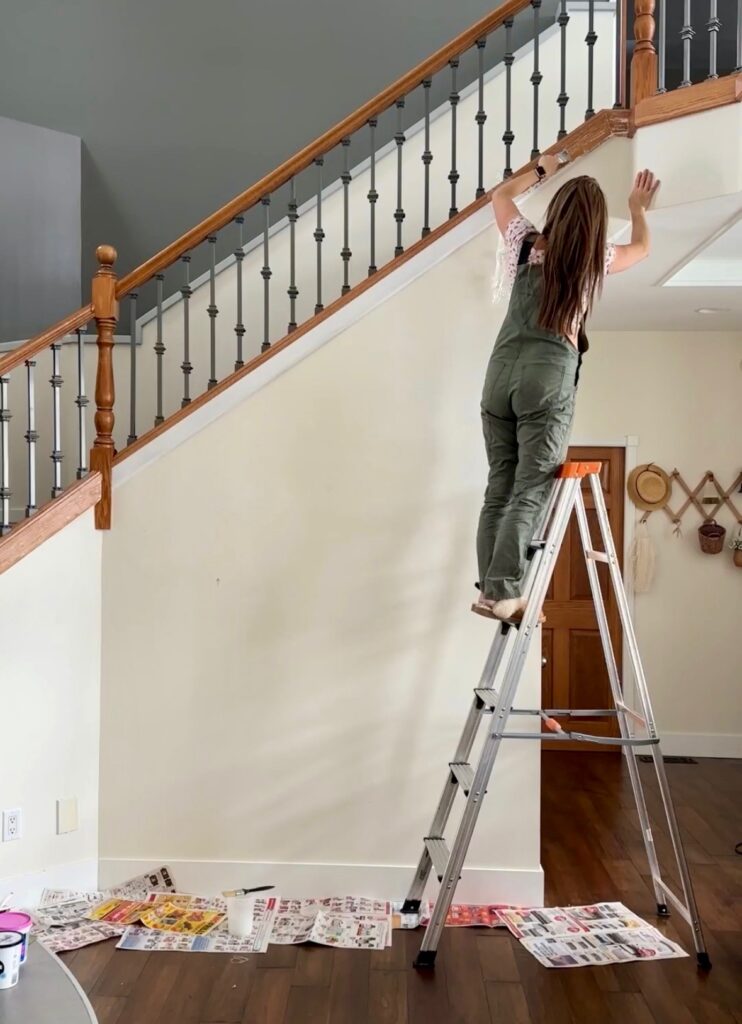
Paint Stripping
EZ Strip® Paint and Varnish Stripper: this stripper will effectively soften and lift most unwanted coatings even multiple layers from virtually all surfaces. Does NOT contain toxic chemicals like Methylene Chloride and NMP!
I loved that it is pet safe and kid safe and had no smell. So I didn’t have to worry about using it in my house.
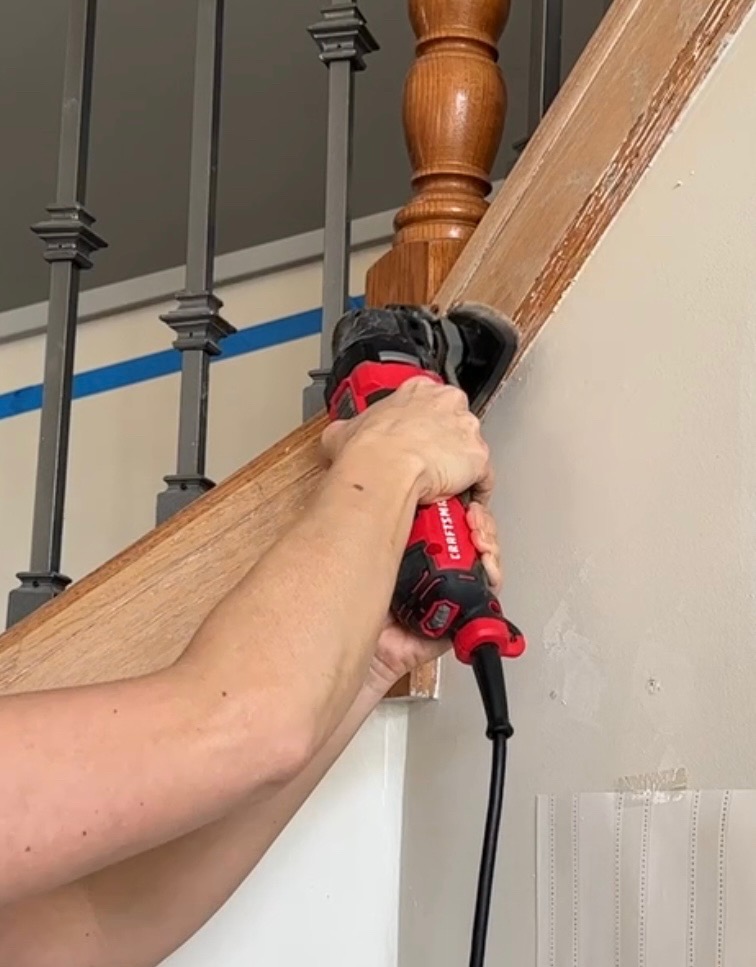
I started out using regular sandpaper but quickly realized I’d be sanding for 23 years. So then I remembered I had this multitool which I used with these sanding pads I ordered up, and now this is my fave sanding tool EVER. It made the job so so fast, and I went through about 10 pads. I’ve used this tool for SO MANY JOBS and will be using it to remove my laundry room floor next.
I started with 80 grit, then went over with 100 grit, and then 150 before staining.
I used Behr stain and semi gloss sealant in natural oak to perfectly match my base rail back to the original oak.
Picture Frame Mouldings and Trim
If you are interested in doing picture frame mouldings in your home and you are making all squares/rectangles with 90 degree angles (which you set your cutter to 45 degrees for, easy peasy) this job is one that is so so easy, and one that you could easily tackle without thinking too much. But if you have multiple angles you will need to be able to figure out how to cut those angles, and this is the big lesson I learned. If I knew 3 weeks ago what I know today, this job woulda been done WAY faster.
You need:
- Mouldings of your choice (I’ll share mine below).
- Painters tape to initially mark out your boxes so you can see what you like.
- A measuring tool for drawing out the boxes exactly as guides for your measurements.
- A mitre saw or a simple hand moulding cutter like this one.
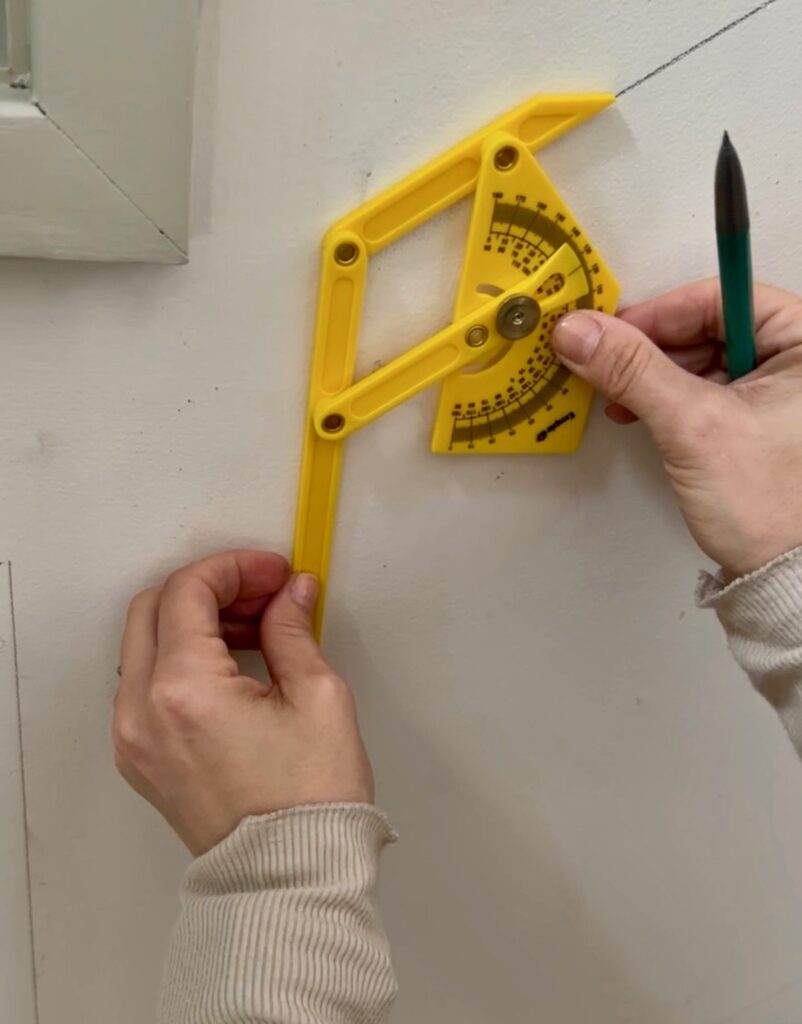
- A protractor (This is the magic angle finding tool right here!)
- A caulking gun and paintable caulk. I use DAP paintable caulk for paint projects.
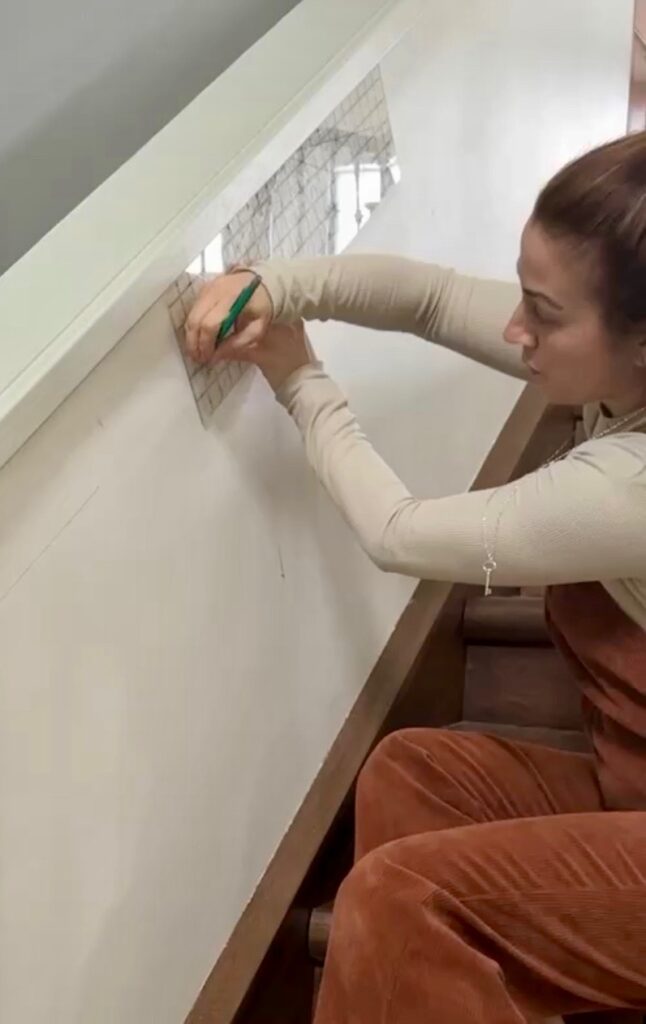
I used this quilters cutting guide for measuring out all my boxes. It saved me SO MUCH TIME. This is one tool I’ve had for 10 years and use it to measure SO MANY THINGS. Wallpaper cutting (especially if I needed to cut a corner through the length of a piece, or end piece perfectly), peel and stick floor tile cutting, fabric cutting, and so much more.
The fact that it is clear and marked and an easy to hold ruler to draw lines with is just everything. So efficient and so accurate.
Next up… The trick for angles.
After you have drawn all your boxes with a pencil to mark the outer edge of the mouldings you will be putting up, you need to figure out the angles.
To measure the angle, align the protractor to the full angle, see what it equals and then divide by 2 to get 1/2 the angle (as you are putting two pieces together to create that angle).
Then set the protractor to that number (so for instance a 140 degree obtuse angle would end up being 70 degrees) and then just take the protractor over to your mitre saw and set the saw to that angle.
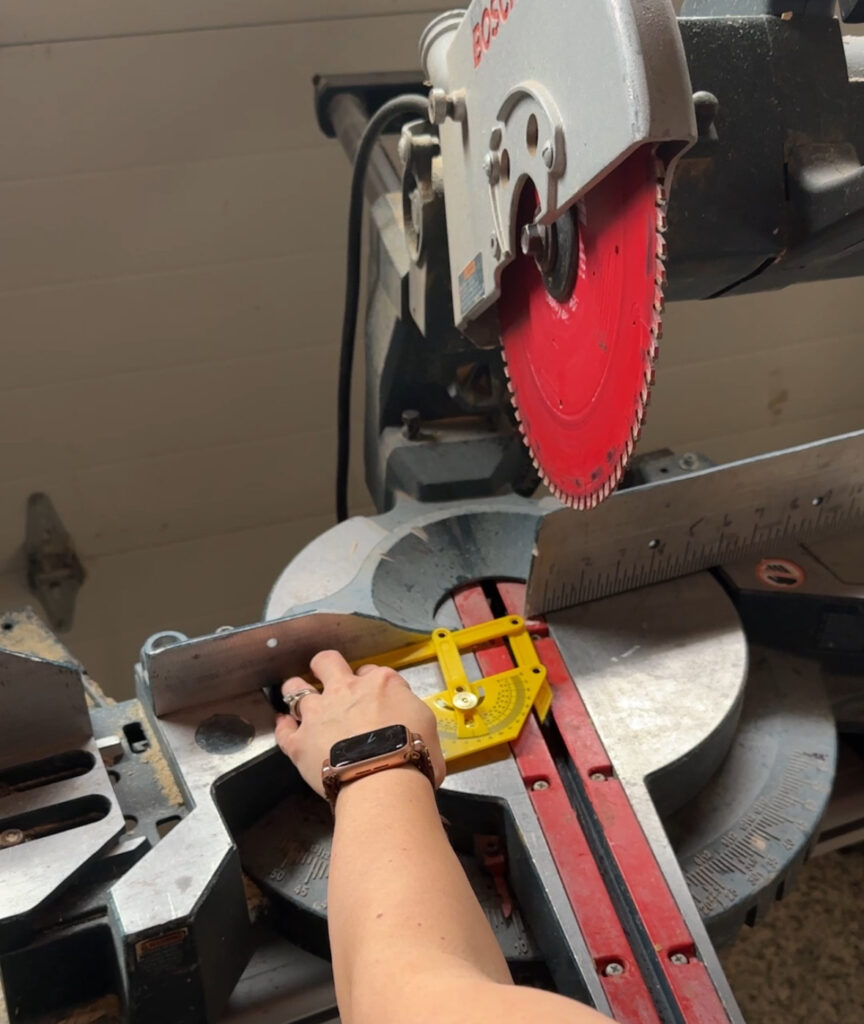
This method allowed me to just forget that fact that the mitre saw has 90 degrees set to 0, making all the other numbers except 45 degrees some kind of mystery (for instance the 22.5 setting is half of 135 degrees – don’t ask me to explain the math wasn’t mathing) but this way, I just used the protractor to set the saw and then I used a test piece to make sure it was exact and then cut my pieces.
Once I figured this out, it went SO SO FAST.
On a cutting tool, I believe the degrees just are the degrees. I do not own one of these because on my mitre saw the cuts are so clean, the blade is so sharp, and my hands are not getting any wear and tear.
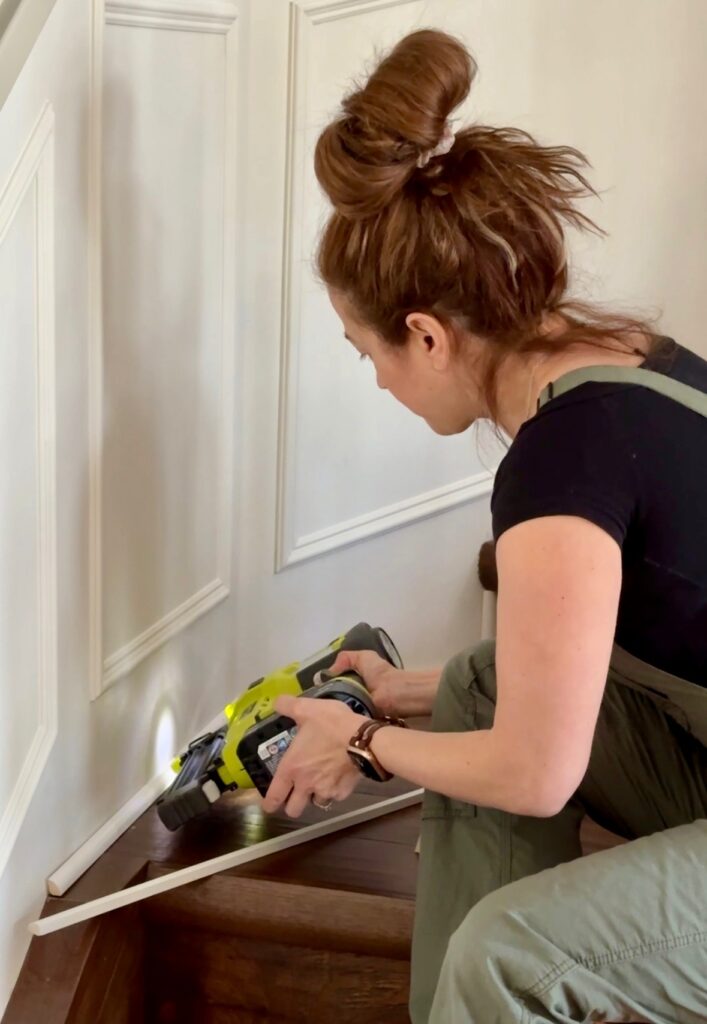
After I made all my cuts, I just used my Ryobi nail gun to affix them to the wall, and then I used my caulking gun and a wet paper towen to seal all edges and corners, fill all the nail holes, and make it all look perfect.
Once I was done applying all the mouldings, I went in and added a shoe moulding to the base of my stairs all the way up as the where the flooring met the wall was never perfect and looked really unfinished ever since we moved in. I followed the exact same process as above.
And then I painted and basked in the glory of a job well done!
Now, to finish up, I just want to add the type of moulding I got! It was from home depot and it is this exact one. It is a 3/8 by 1-1/8 primed finger jointed pine panel moulding. Say that 3 times fast.
I hope that you found this information helpful, and as always feel free to DM me on my Instagram if you have any questions.
Next up, I’ll be sharing all the styling in this space that includes SO MANY marketplace finds, a whole new door paint colour, and more.
Thank you for joining me here!
Click here for a link to my Amazon faves for the kitchen, crafting, and garden!
Canadian FRIENDS:
links to the goods


american FRIENDS:
I need to add that I always check locally for all items at a lower price before using amazon.
I do make a small commission on all purchases at no extra cost to you.
Click here for a link to my Amazon faves for the kitchen, crafting, and garden!
