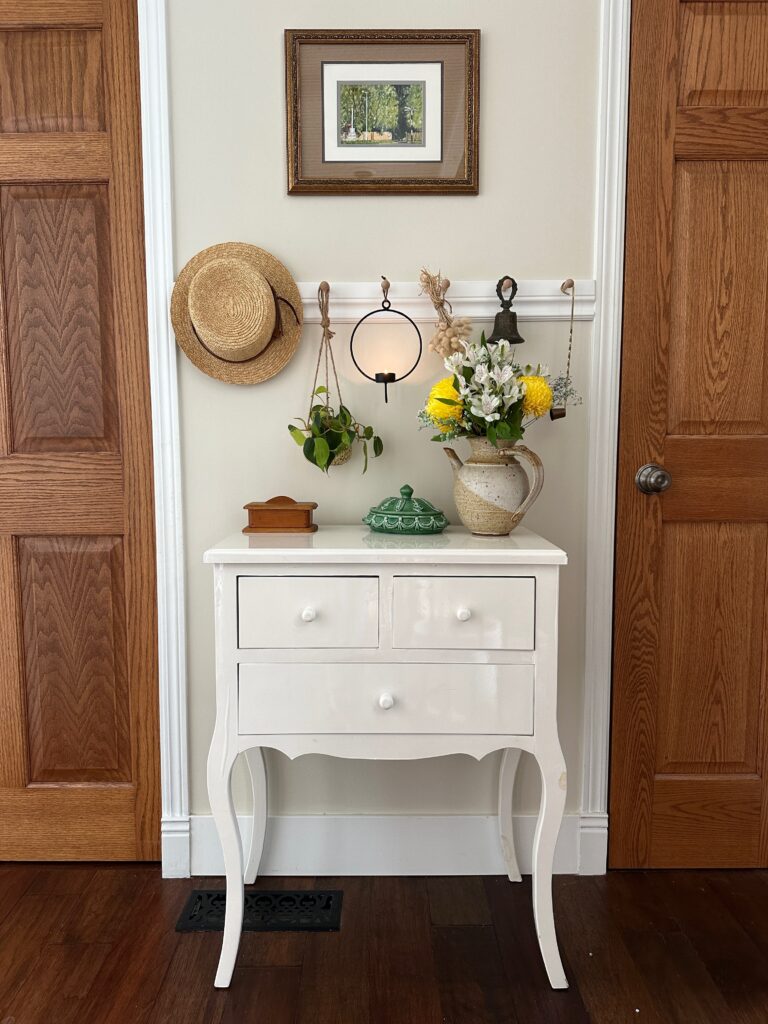
There is nothing I love more than non-committally (not a word but I’m going with it) hanging stuff on my walls.

From picture frames to handle holders to hanging plants to hats and baskets, just give me all the ability to change my mind and move stuff around. Can you relate?
If you answered YES, then peg rails are for you. And luckily they are SO easy to make.
HOW TO MAKE A PEG RAIL:
- Measure the spot for your peg rail.
- Go to Lowes or Home Depot and choose a moulding you love. I personally look for one with a flat space on it that will accommodate the peg holes well, and a slightly rounded top and bottom edge. (Some mouldings have a hard flat edge to suit floors, so don’t choose baseboard).
- Cut to size here on site, or make it a bit bigger to saw at home.
- Get some shaker pegs in the size and amount you like. The ones like I used above have the base you drill to match and glue after inserting. These are more sturdy than the ones with screws in them. I get my pegs from Lee Valley and they are SO INEXPENSIVE, but Amazon has some too. Just search “shaker pegs”. I used pegs here that are 2.75″ (link) but I’ve used larger ones for bathrooms where big towels etc will hang.
- An ODD number of pegs usually looks better in my opinion as you have a centre peg to hang from and it makes things look more balanced.
- Mark the centre spot in your moulding and then lay out all your pegs. I like to take whatever space the middle pegs have and then go 1/2 as much on either end. Leaving the same amount of space on the end pegs looks weird. For instance, on my image above I did 5 inches on all middle pegs and 2.5 inches on either end.
- Mark a cross hair on each peg spot to make sure it’s exactly centred. You will put the pointy part of your drill bit on that exact spot!
- Use a drill bit that matches the size of your pegs (I just hold up the bit and the bottom of the pegs), and drill holes through your moulding.
- Affix the moulding to the wall using glue or a nail gun or finishing nails and a level.
- Fill all the nail holes with spackle and caulk all the edges with paintable caulk. Sand holes once dry.
- Paint the moulding.
- Insert your pegs with some wood glue on the base and voila! A beautiful and useful peg rail for endless decor and clothing hanging ability!
Let me know if you have questions or tag me if you make one!
Click here for a link to my Amazon faves for the kitchen, crafting, and garden!
Canadian FRIENDS:
links to the goods
american FRIENDS:
I need to add that I always check locally for all items at a lower price before using amazon.
I do make a small commission on all purchases at no extra cost to you.
Click here for a link to my Amazon faves for the kitchen, crafting, and garden!


