


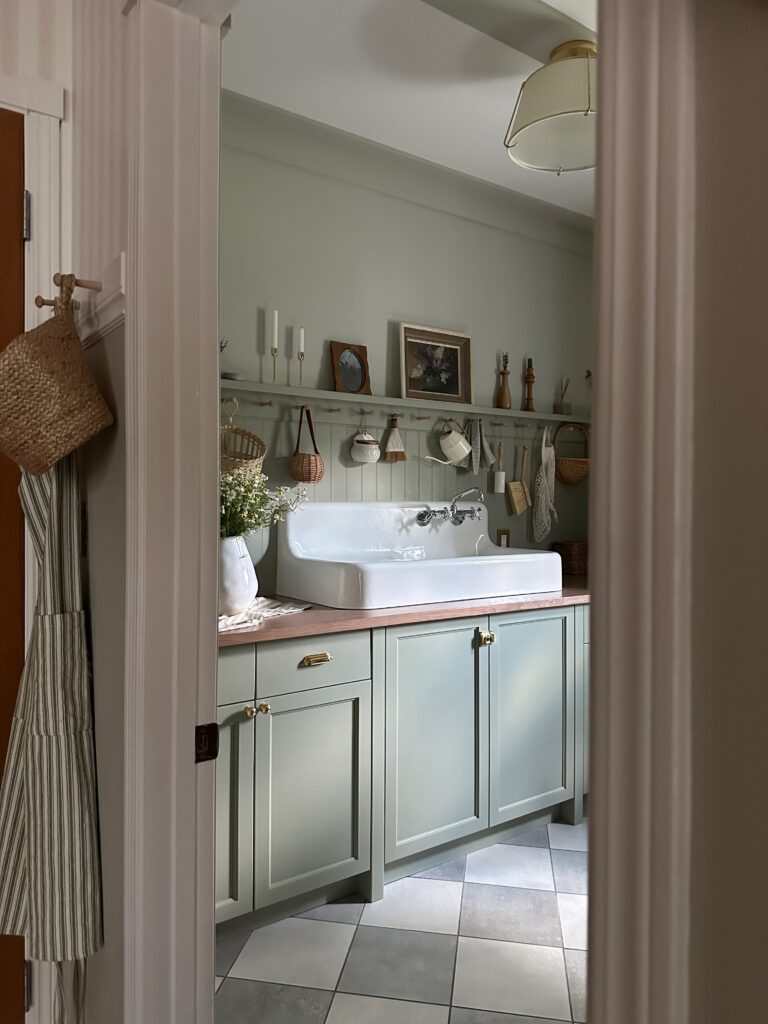
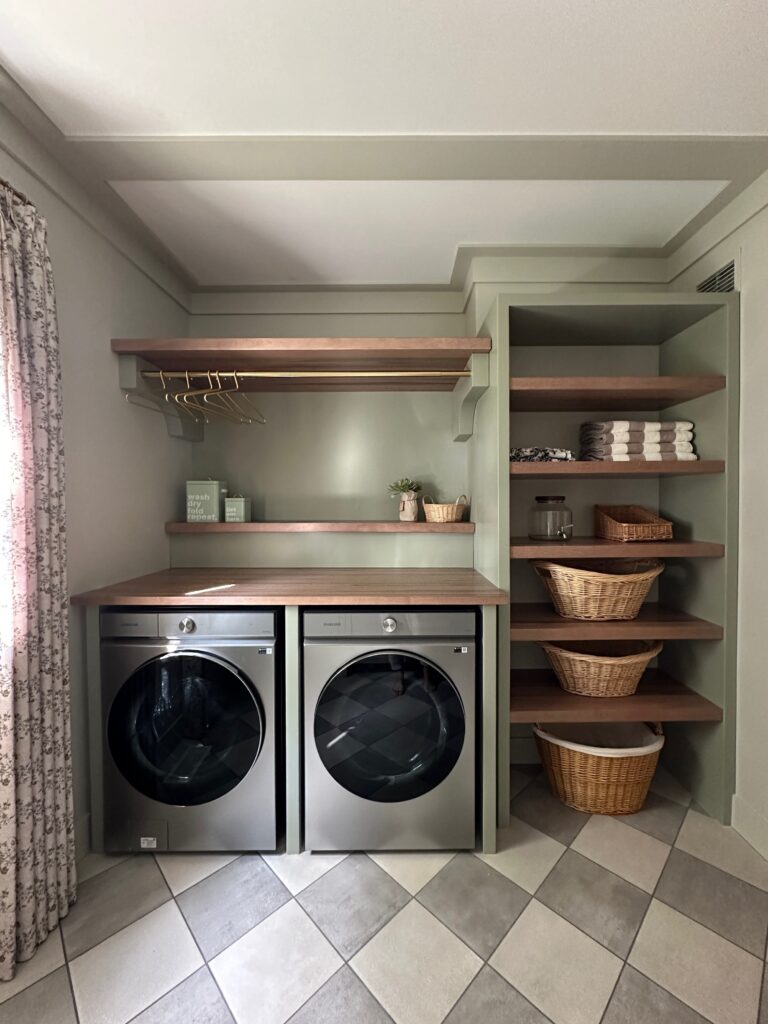
“The room looks so good it could be AI” moment happened for me as I was shooting some images for my laundry room, which I will share more of in-depth and in detail with more than just iphone photos (which these are) coming up… But I am so thrilled with how it turned out!!
For now, I’m just here to share the cost and material breakdown and links for you in case you want to try your hand at a DIY like this.
I wanted a very chunky but simple looking crown moulding with “cross beams” to cover holes where old lighting had been (and to add interest). The rest of my home does not have crown moulding and I feel like to start adding a more ornate or traditional version would be a slippery slope, but this look was just perfect and I feel added so much character to the space.
It was actually all pretty simple as far as the process, although time consuming with all the attention to detail I invested on the caulking and filling and painting etc. But much easier than using traditional crown moulding which can be tricky especially with walls and corners that are not perfect.
Crown Moulding:
I used this 6 inch x 1 inch MDF for the bottom part of the crown moulding which went up first around the perimeter of the wall where it meets the ceiling ($125). Then I added this 3 inch x 1 inch mdf butted up against it on the ceiling ($64). Added some caulking and paint and voila! The most gorgeous clean lines!
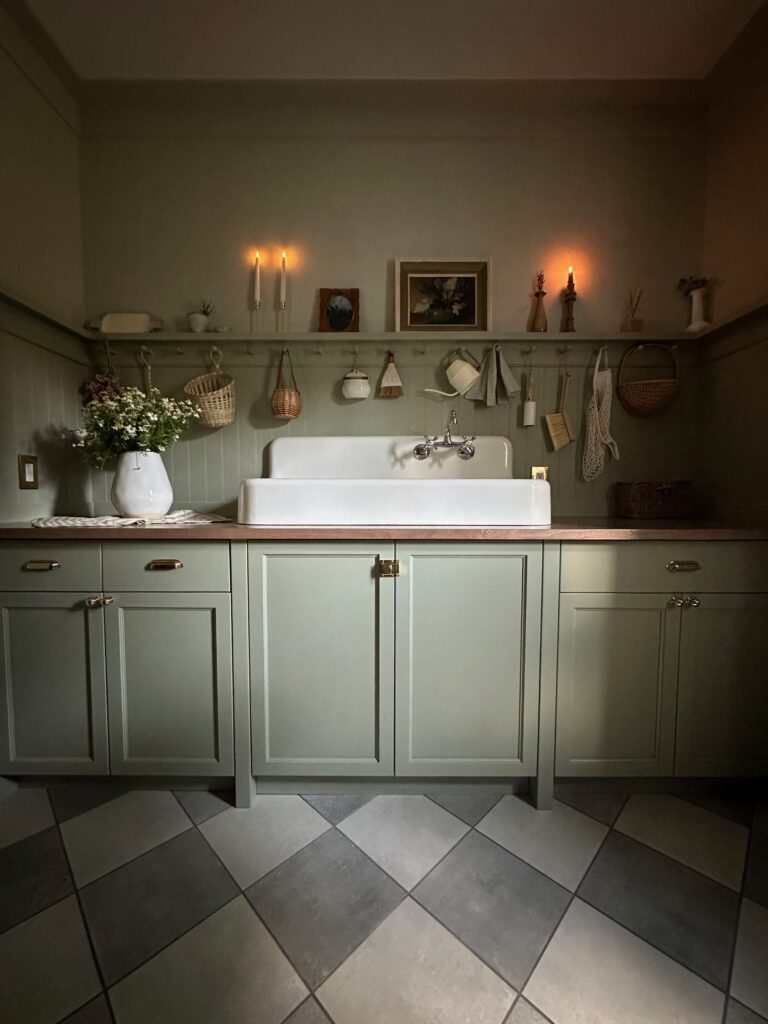
Now for the backsplash.
I picked up this beadboard from Rona which was $56 and I had them cut it into 4 equal 4 foot x 24 inch pieces which was enough to cover my whole backsplash. I started by a 2.5 x .5 inch moulding to the base, a 1 inch x .25 moulding to the sides, and capped with a 4 inch decorative moulding. I used these pegs to create my peg rail. I then added a simple plain 2.5 x .5 inch moulding upside down and nailed all across the top of the peg rail and nailed on another piece of the 1 inch moulding to create the “lip” of the picture ledge. Caulked and painted and voila!
Rona has had the most amazing sales on their mouldings recently so this whole backsplash was around $100!
If you want to see the tutorial for the peg rail please check it out here!
I hope you liked my lil tutorial, and how I took $300 and added so much character to this space, let me know if you have any questions or DM me on my Instagram!
A post with all the links to styling etc will be coming next!
Click here for a link to my Amazon faves for the kitchen, crafting, and garden!
Canadian FRIENDS:
links to the goods


american FRIENDS:
I need to add that I always check locally for all items at a lower price before using amazon.
I do make a small commission on all purchases at no extra cost to you.
Click here for a link to my Amazon faves for the kitchen, crafting, and garden!
